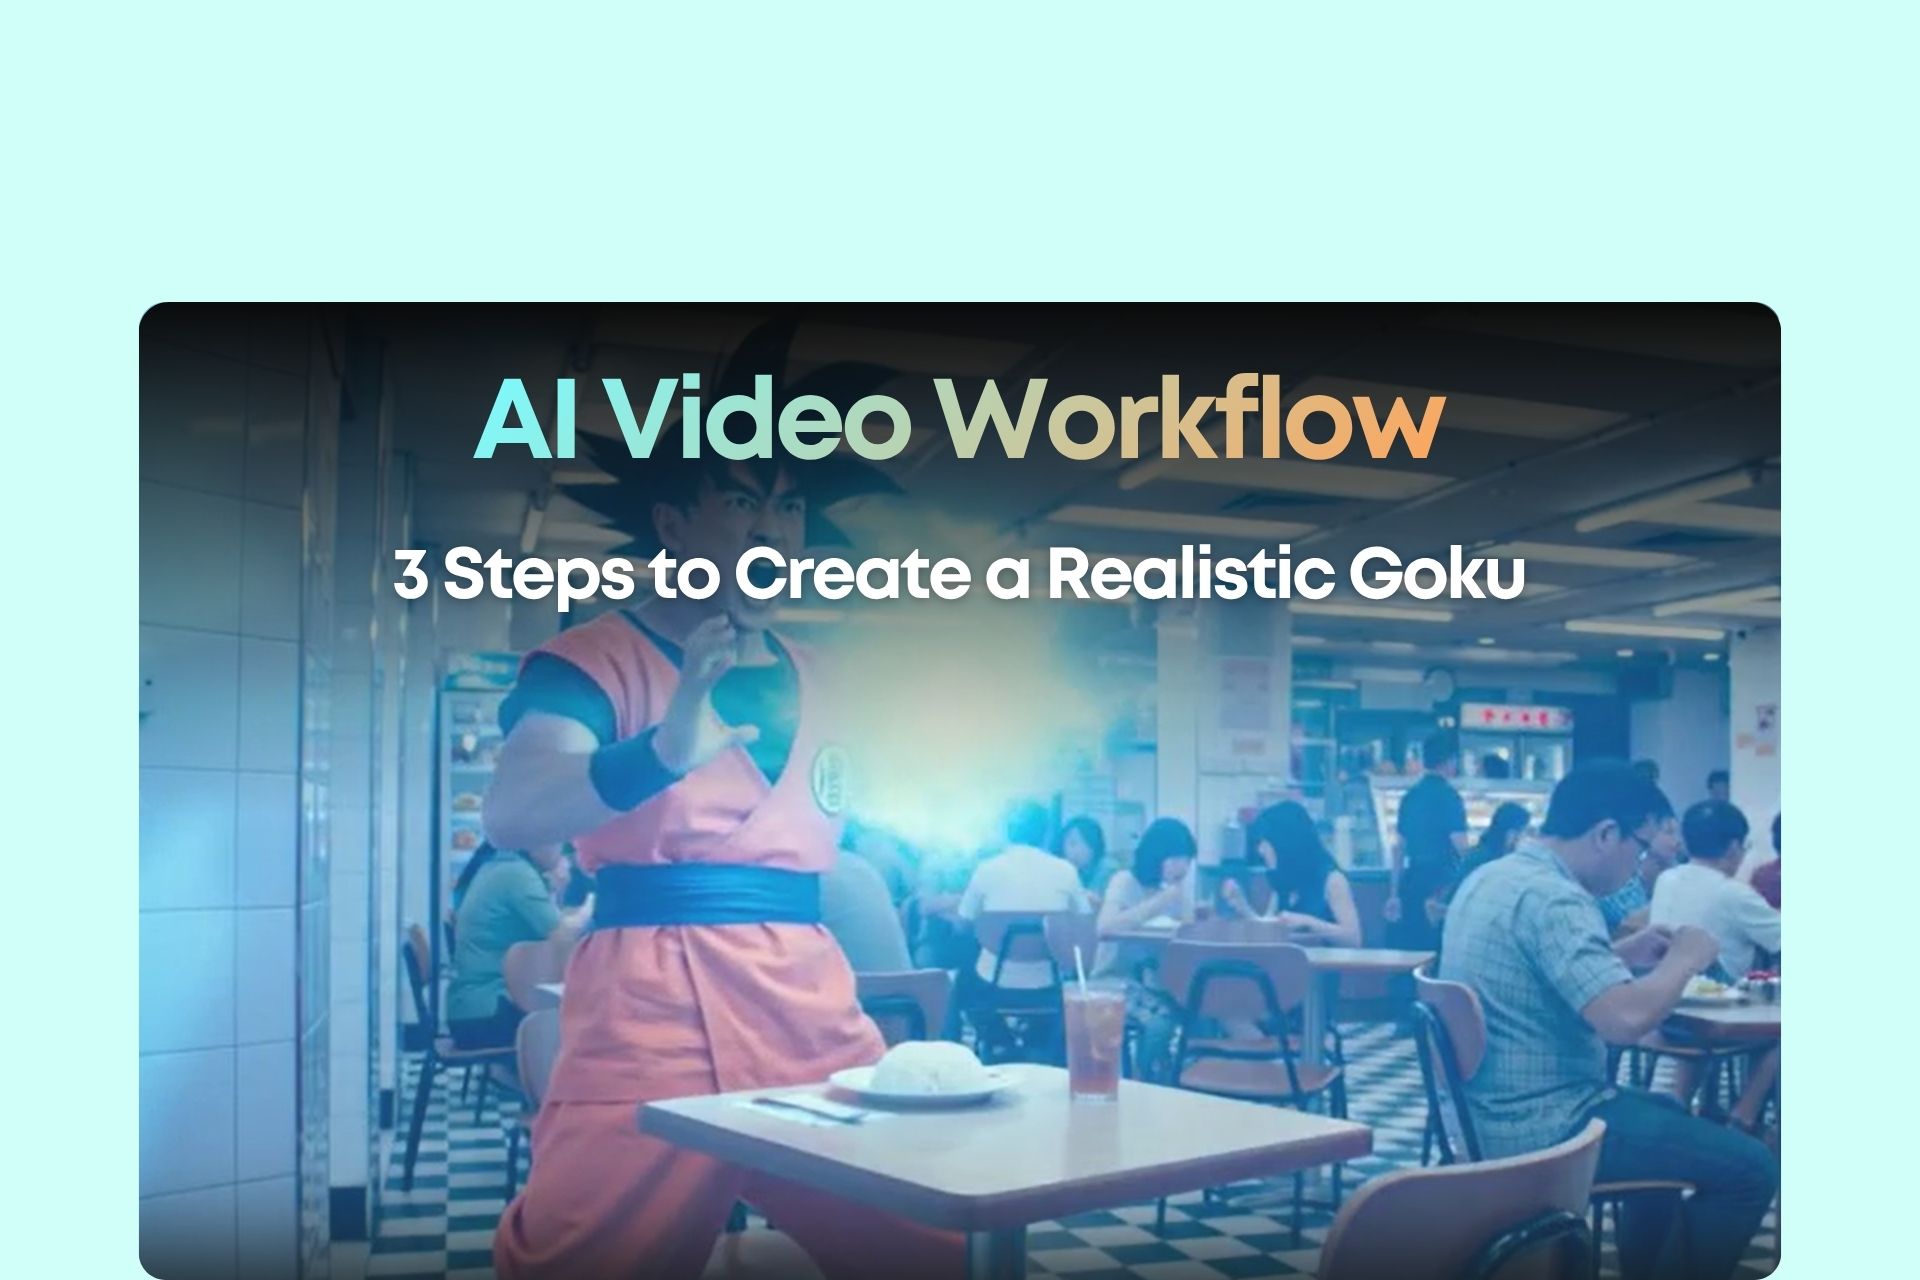
For many creators, the two biggest pain points in making AI short videos have never been “not having the right tools,” but:
Keeping the character’s look and style consistent
Controlling visual quality and overall polish
The result: you spend the time, but the final output still feels like a “half-finished demo.”
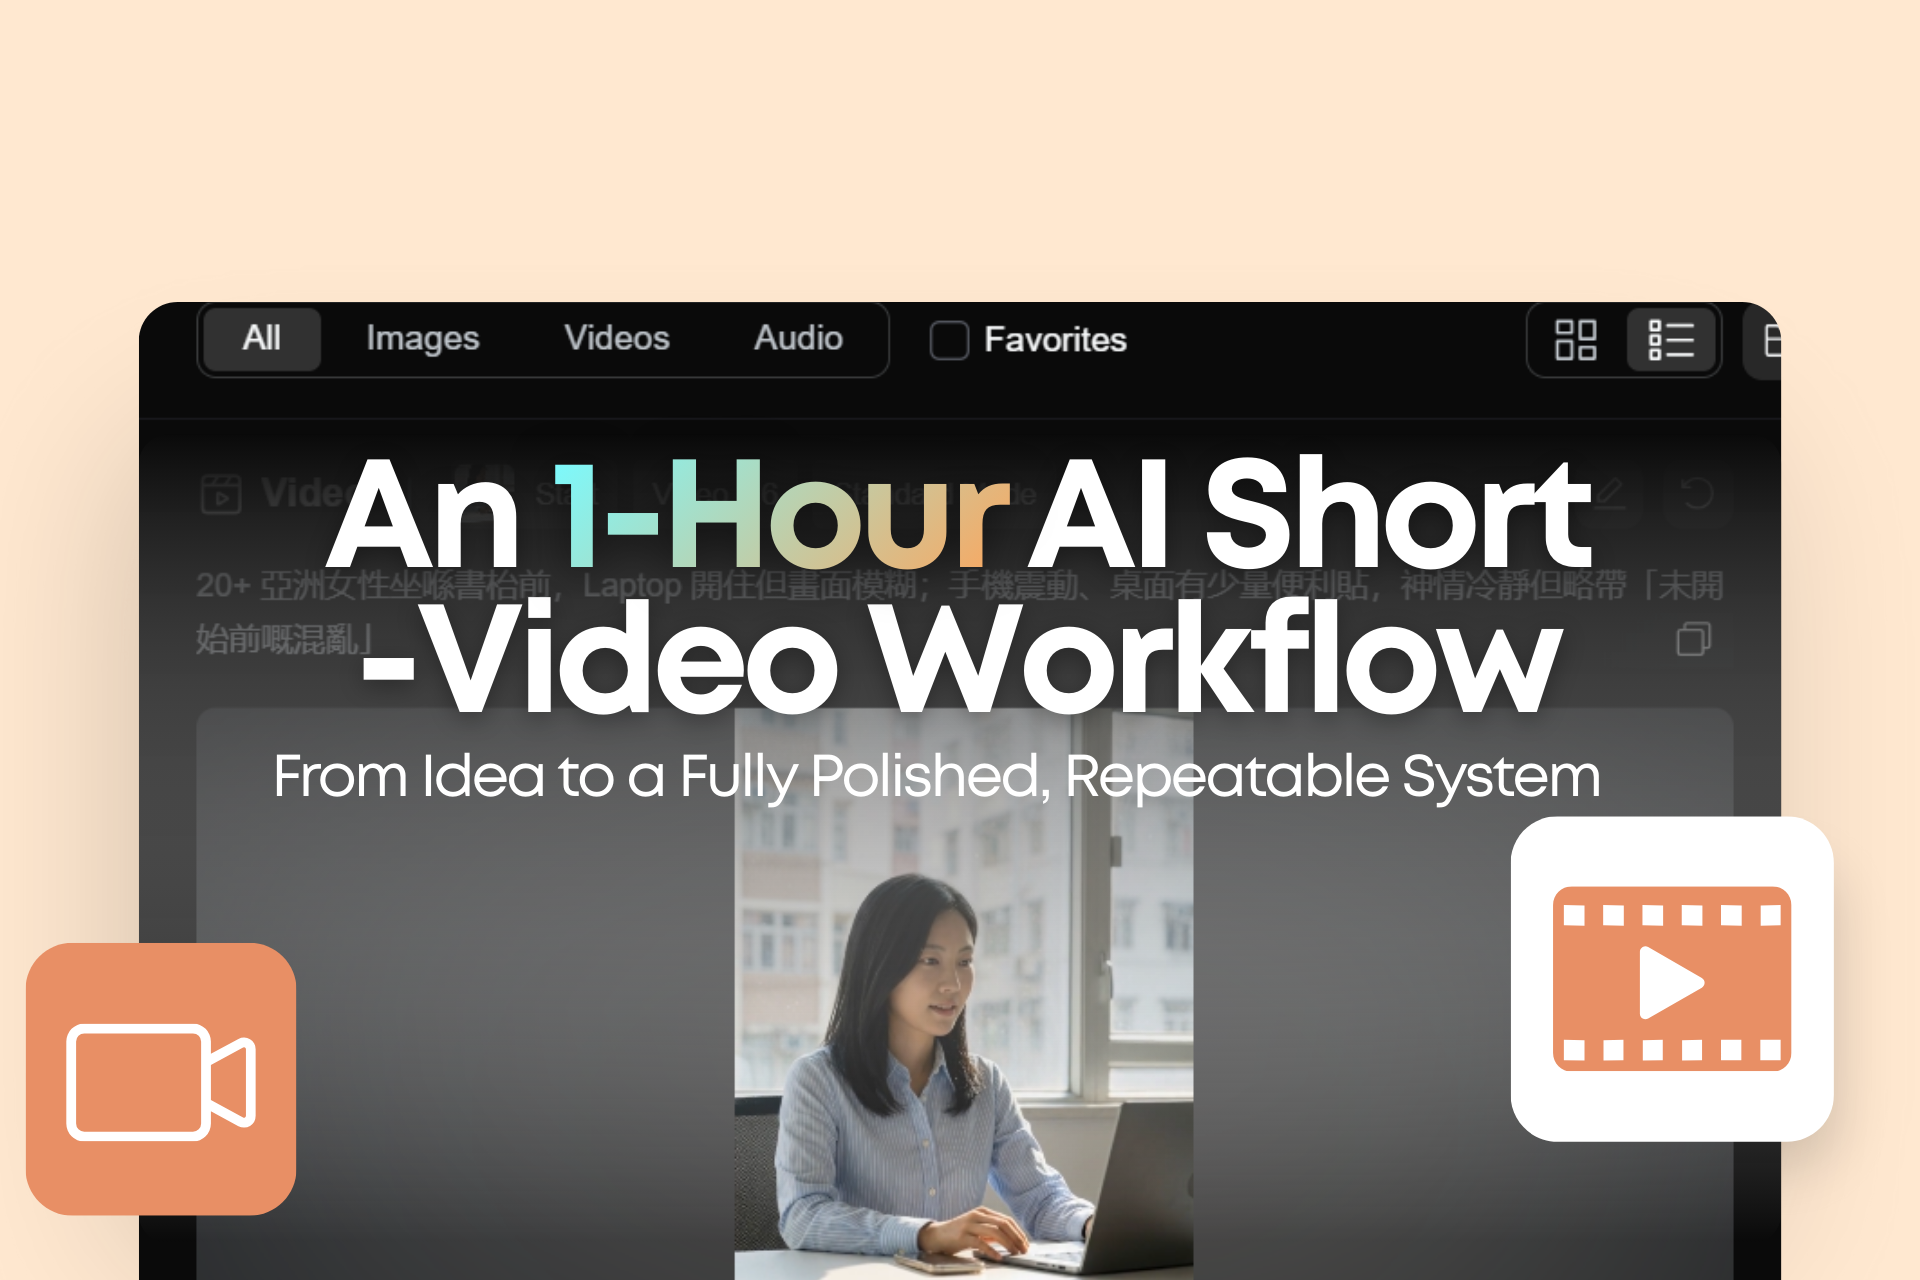
This article breaks down a battle-tested 5-step AI short-video workflow that compresses what used to take days—or even a full team—into just a few hours, while keeping characters consistent, visuals stable, and the whole process repeatable.
Step 1: AI Super Screenwriter — From an Idea to an “Executable” Storyboard
A high-finish short video isn’t driven by inspiration—it’s driven by a storyboard script you can execute immediately.
The biggest wrong approach is: “Write me an AI short film story.”
Vague instructions like that only get you a bunch of text you can’t actually use.
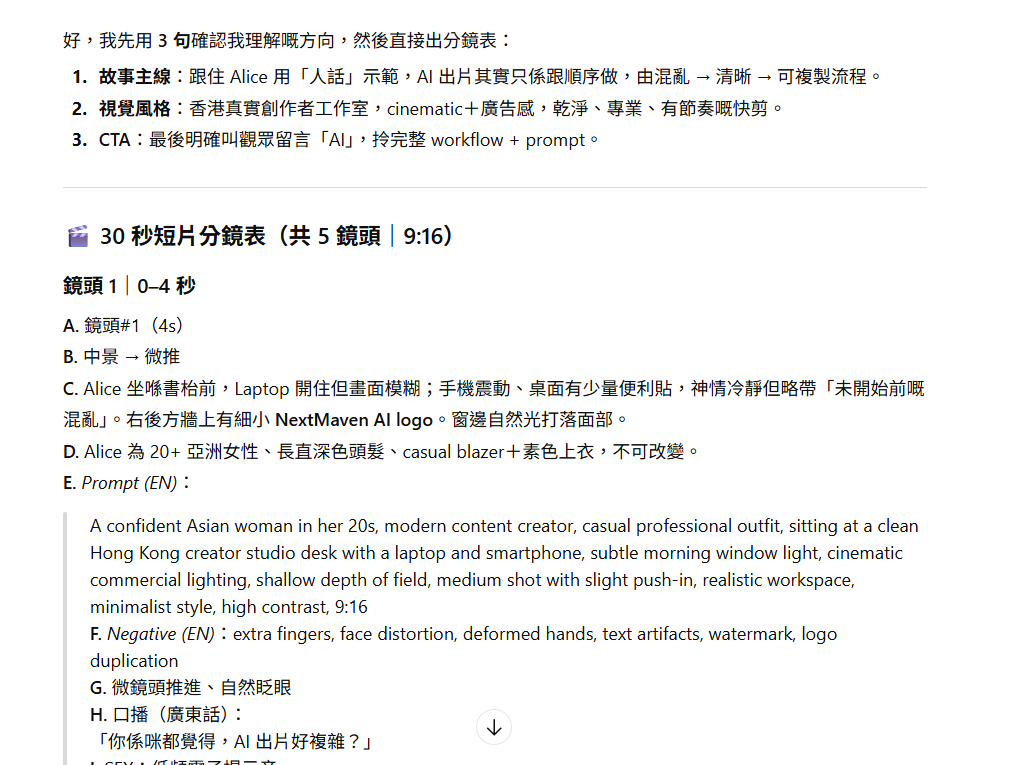
The right approach: from the start, require the AI to output in shot list (storyboard) format, not a normal article.
A proper shot list must include three elements:
- Visual description: clearly define the character, setting, and visual focus
- Cinematography language: shot size (close-up / medium / wide) and pacing
- Voiceover lines: one set of lines per shot that can be recorded directly (about 5–8 seconds)
👉 Resource: Template 1 | AI Super Screenwriter Prompt
(Copy and paste this prompt, then insert your concept:)
You are a professional short-film director and screenwriter. Turn my story concept into a 45–60 second short-video storyboard script.
Your output must include:
1. One logline
2. A pacing structure of 3-second Hook / 20-second Wrong vs Right / 7-second CTA
3. A shot list (minimum 8 shots). Each shot must include:
4. Setting
5. Shot size (close-up / close / medium / wide)
6. Camera angle (eye-level / top-down / low-angle)
7. Character action and expression
8. Key props or on-screen text
9. Visual style keywords
10. Dialogue (if any)
Constraints: each shot should be 3–5 seconds; shots must be editable and coherent.
My story concept is: {paste your concept}
Target audience: Hong Kong / Cantonese audience; tone natural and fast-paced.
Once you finish this step, what you have is no longer an “idea”—it’s a blueprint you can hand to AI for execution.
Step 2: Character Consistency Setup (Character Consistency)
Most AI short videos fail not because the visuals aren’t pretty, but because—
The character looks different in every shot, like they’re not the same person at all.
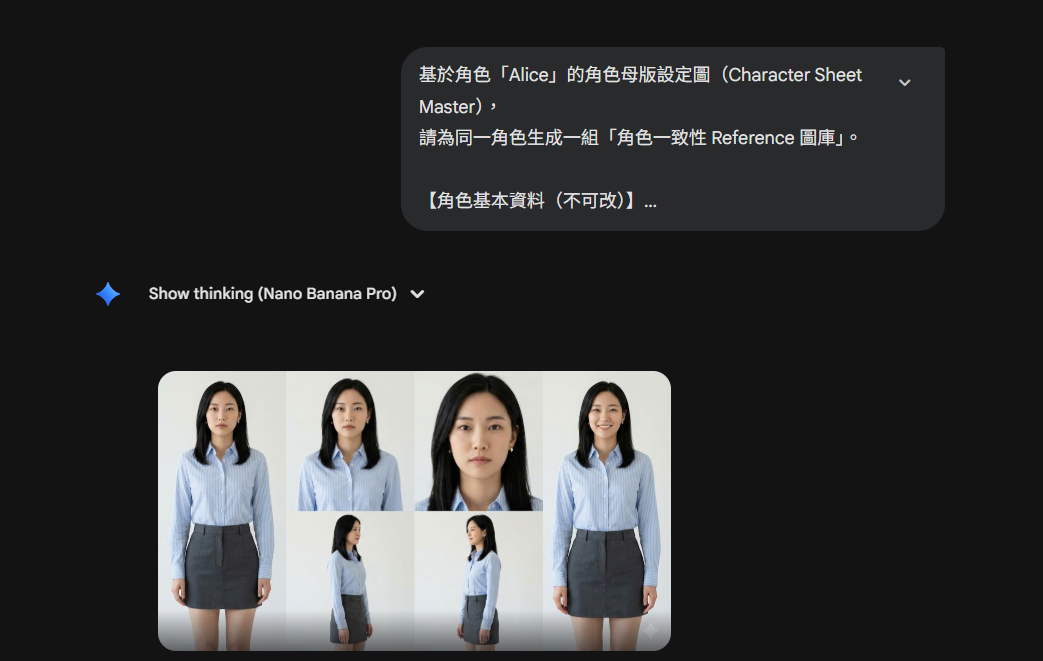
The solution: build a Character Sheet (a “character ID card”).
Core rule: first separate “what can change” from “what must never change.”
Non-negotiables (must be locked):
- Face shape and facial proportions
- Skin tone, hair direction/parting
- Age impression, overall vibe
- Fixed outfit colors or signature accessories
Variables (allowed to change):
- Facial expression, pose
- Background/setting, camera angle
- Lighting, emotional tone
Reference Library Recommendation
Prepare at least 6 reference images:
- Front view
- Left profile
- Right profile
- Half-body
- Full-body
- Natural smile
Tool-wise, you can use Nano Banana Pro or similar solutions to lock consistency using a “master character image + reference images,” without needing to train a model from day one.
👉 Resource: Template 2 | Character Sheet Prompt
Please create a “Character ID Card” for me, split into non-negotiable elements and variable elements.
The non-negotiables must be detailed enough to act as consistency anchors (facial proportions, hair direction, vibe, signature accessories).
The variables should list what is allowed to change (outfit, background, pose, emotion, camera).
Finally, output one “consistency anchor description” (80–120 Chinese characters) that I can paste every time I generate.
Character concept: {character setup}
Step 3: Cinematic Visuals (Images First, Then Video)
If you generate videos directly from text (Text-to-Video), the result is usually—uncontrollable.
A more stable approach is a two-step method:
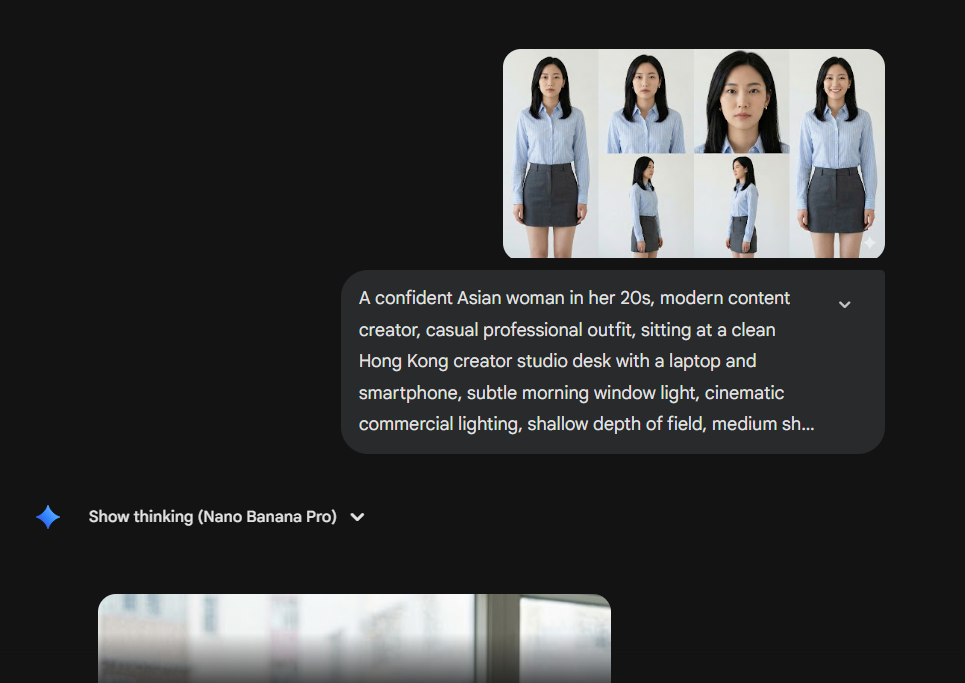
1. Text-to-Image
- Use the visual descriptions from Step 1
- Add the locked character references from Step 2
- Generate one static keyframe per shot
Why this works: in the “still image stage,” you can fully control composition, lighting, and wardrobe details—rather than gambling on randomness.
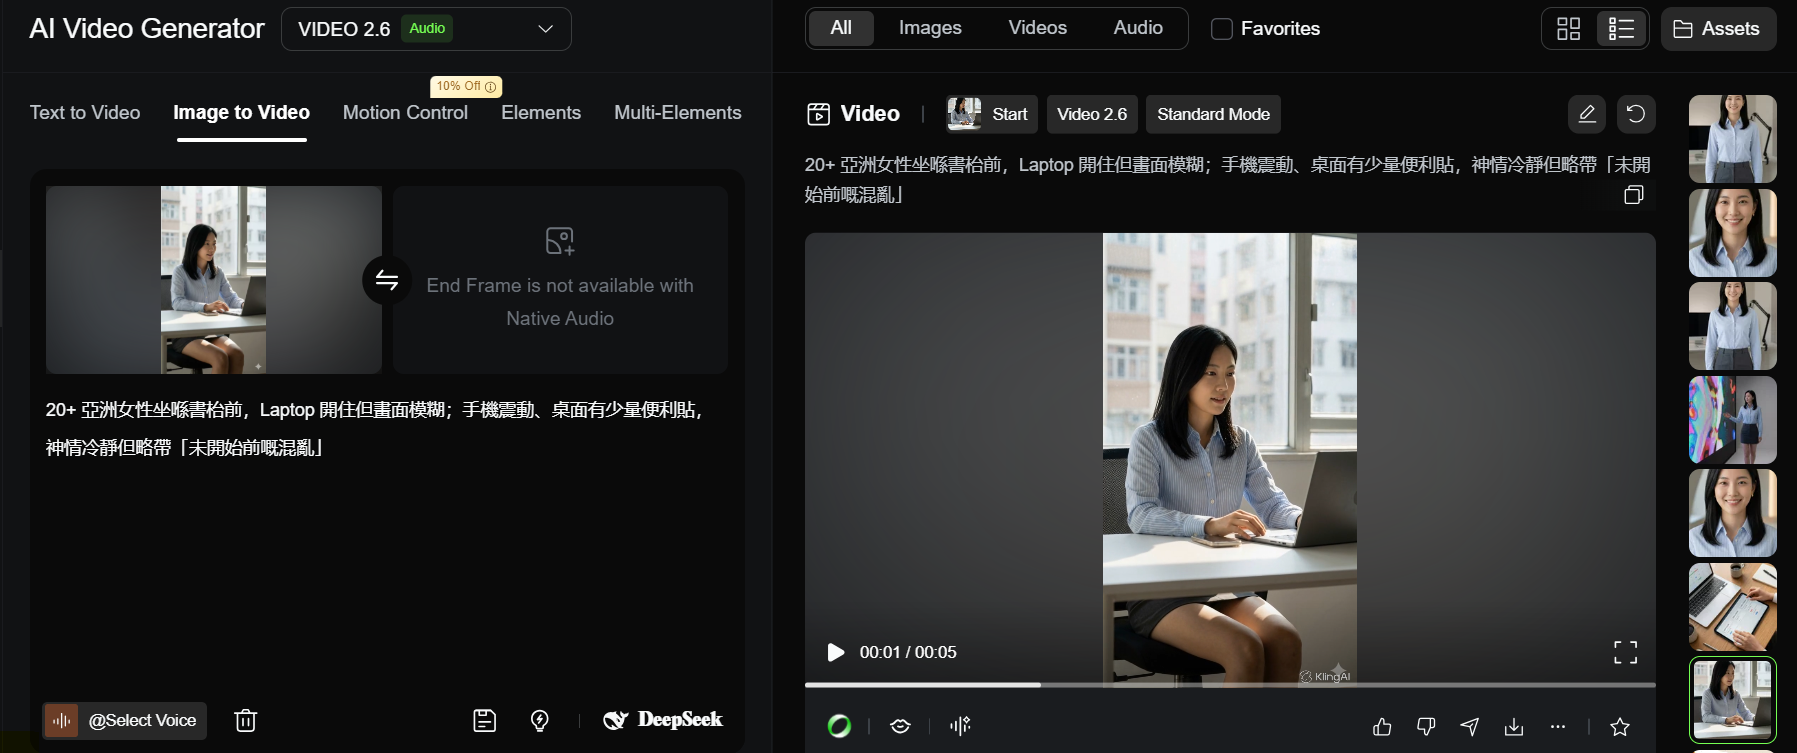
2. Image-to-Video
- Use the approved keyframe as the starting frame
- Use tools like Kling
- Add only a small amount of controlled motion instructions
👉 Resource: Template 3 | Shot Prompt (Image/Video)
Based on the consistency anchor and shot requirements below, generate a single-shot visual description (usable for image or image-to-video).
Consistency anchor: {paste anchor}
Shot ID: {S01_SH03}
Setting: {office/street/cafe...}
Shot size & angle: {close-up/eye-level...}
Action: {what the character does}
Emotion: {nervous/confident...}
Style: {realistic/animation/cinematic...}
Constraints: do not change facial proportions or signature accessories; keep on-screen text minimal and clear (if needed).
Step 4: AI Voiceover + Lip Sync (Lip Sync)
After the visuals are done, the biggest giveaway usually comes from two things:
Audio and mouth movements.
Workflow
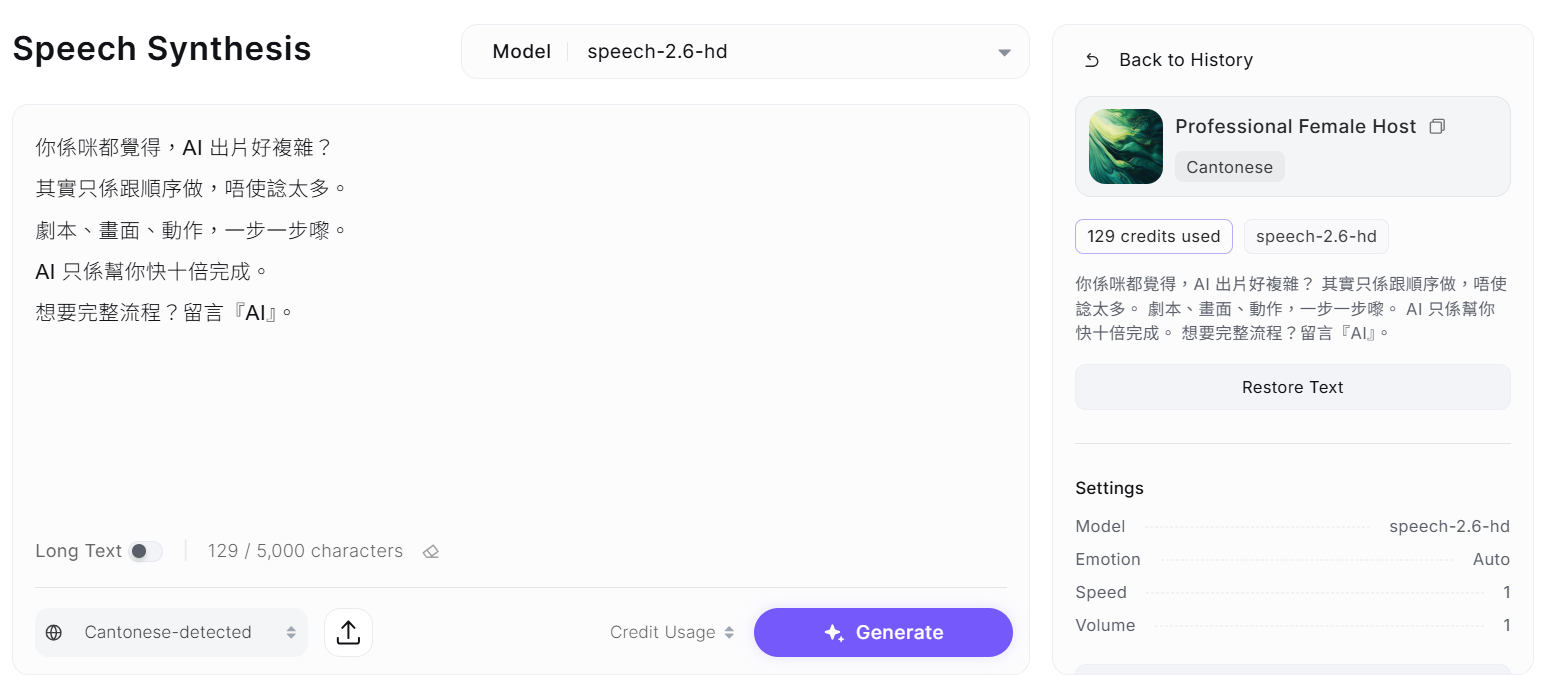
1. AI voiceover
Use tools like Minimax
Turn the storyboard voiceover lines into Cantonese narration
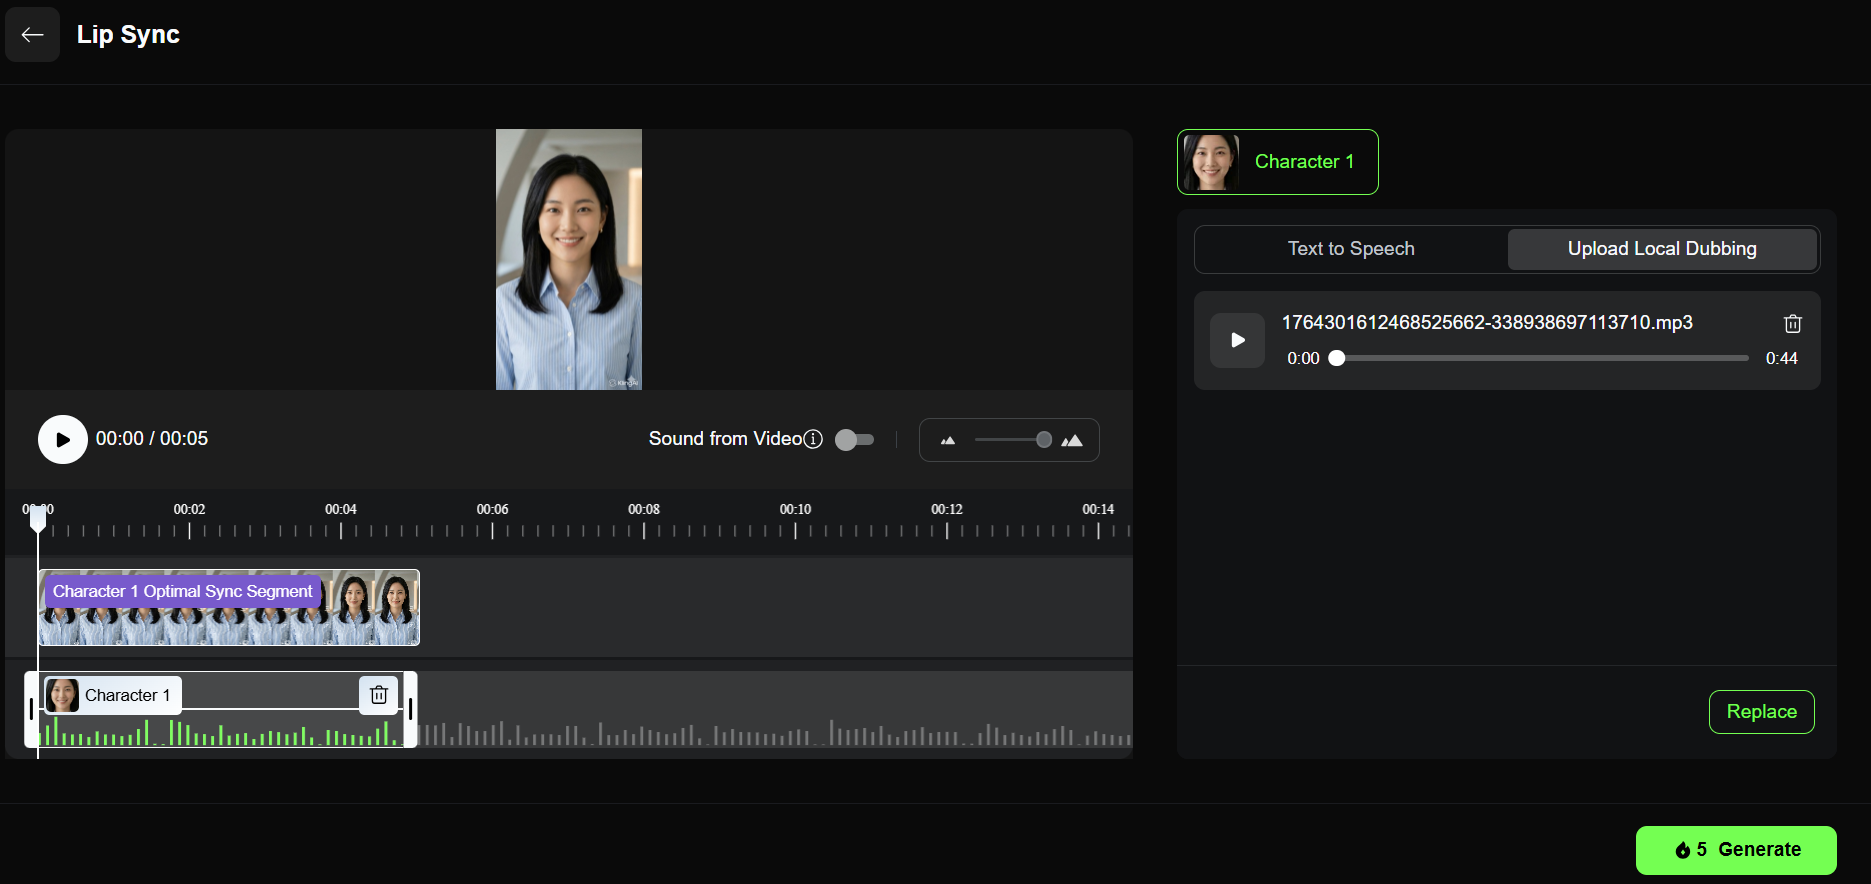
2. Lip sync (only for necessary shots)
Only process close-up shots where the character really needs to speak
Use Kling’s Lip Sync feature
AI analyzes the audio and drives mouth movement automatically
👉 Resource: Template 4 | Lip Sync Prompt
Rewrite the following dialogue into Cantonese lines that are “lip-sync friendly”:
Short sentences
About 8–12 characters per line
Add natural pauses (“…”)
Emotion tags (in brackets: calm/excited/helpless)
Original dialogue: {paste}
Step 5: AI Editing Acceleration + Assembly
By the final step, there’s not much technical difficulty left.
You already have:
Character-consistent video clips
Lip-synced talking shots
Full voiceover audio
Recommended tools: JianYing (剪映) or CapCut
Suggested process:
Align video and audio on the timeline
Add royalty-free BGM
Manually adjust subtitles (size, pacing, emphasis) — it usually looks better than fully automatic captions
Conclusion: The Real Key Is “Control”
This workflow isn’t about how many AI tools you use. It’s about this:
At every step, you know exactly what you’re controlling.
With structured prompts + staged generation (images first, then video), you stop being dragged around by AI randomness—and start working like a director, clearly deciding:
What the audience should see
What they should hear
What they should remember
Now, copy the prompts above and start making your first AI short video that actually feels finished.